
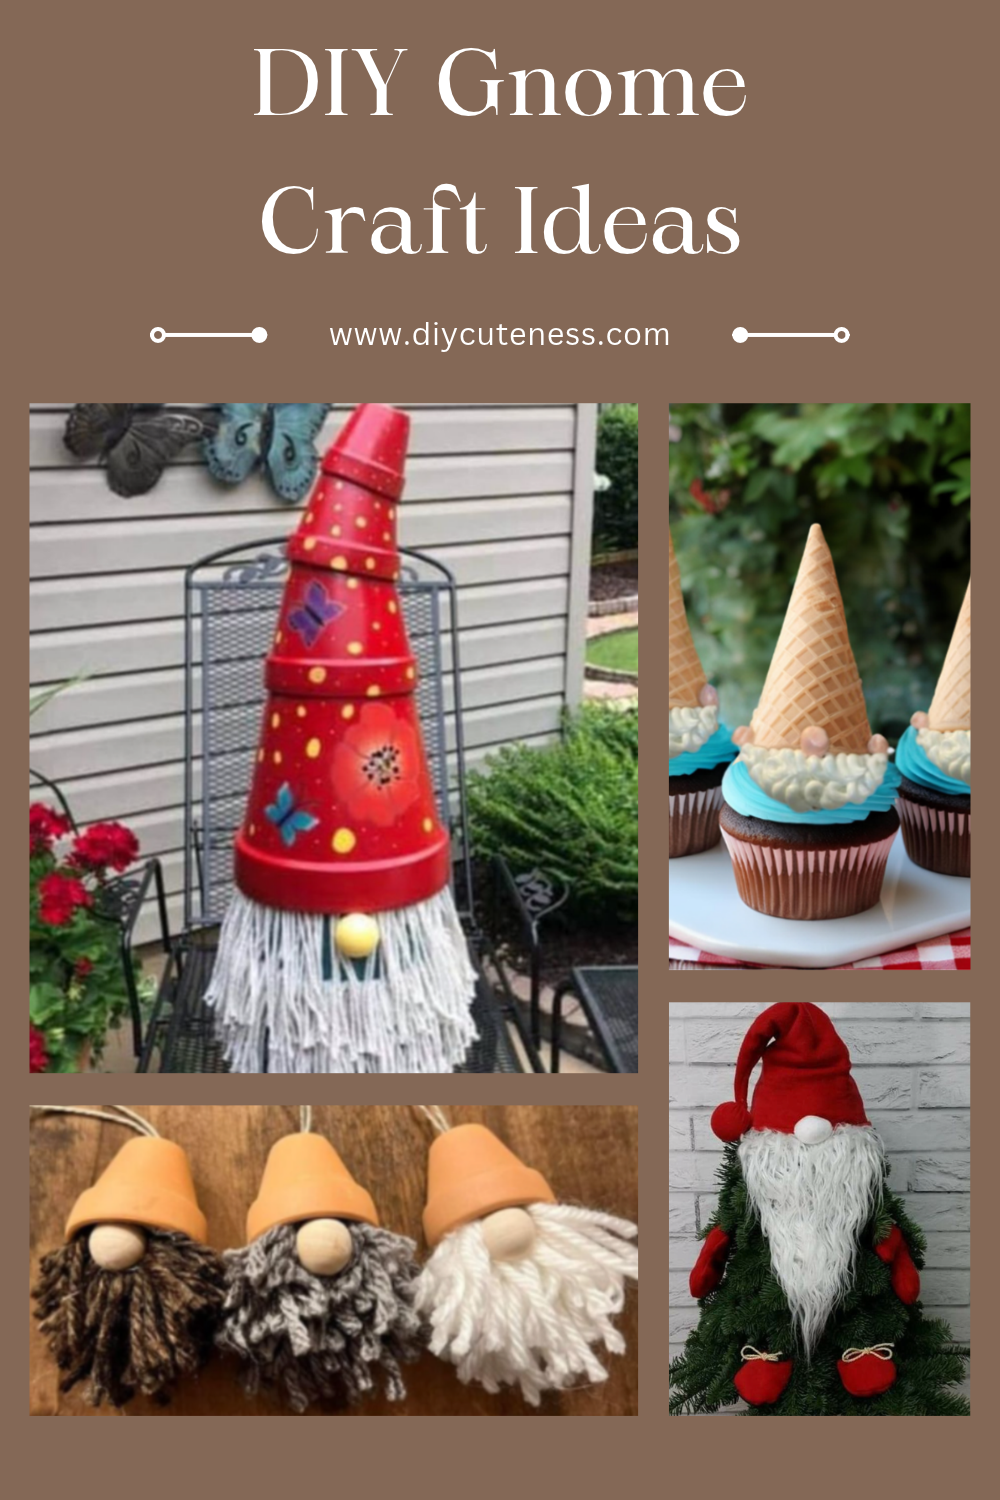
Making your own gnome is easy, affordable, and a great way to give everyday items a second life. Worn-out socks, sweaters, and pajamas can all become charming decorations, and so can plant pots, jars, and other things you already have around the house. Pick the method that suits your supplies and skill level.
Basic Supplies (Used in Every Method)
- Scissors
- Glue (hot glue or strong craft glue works best)
- Faux fur for the beard
- Small wooden balls, beads, or pompoms for noses
- Decorations: Paint, ribbon, glitter decals, and anything else you like
- Needle and thread (optional)
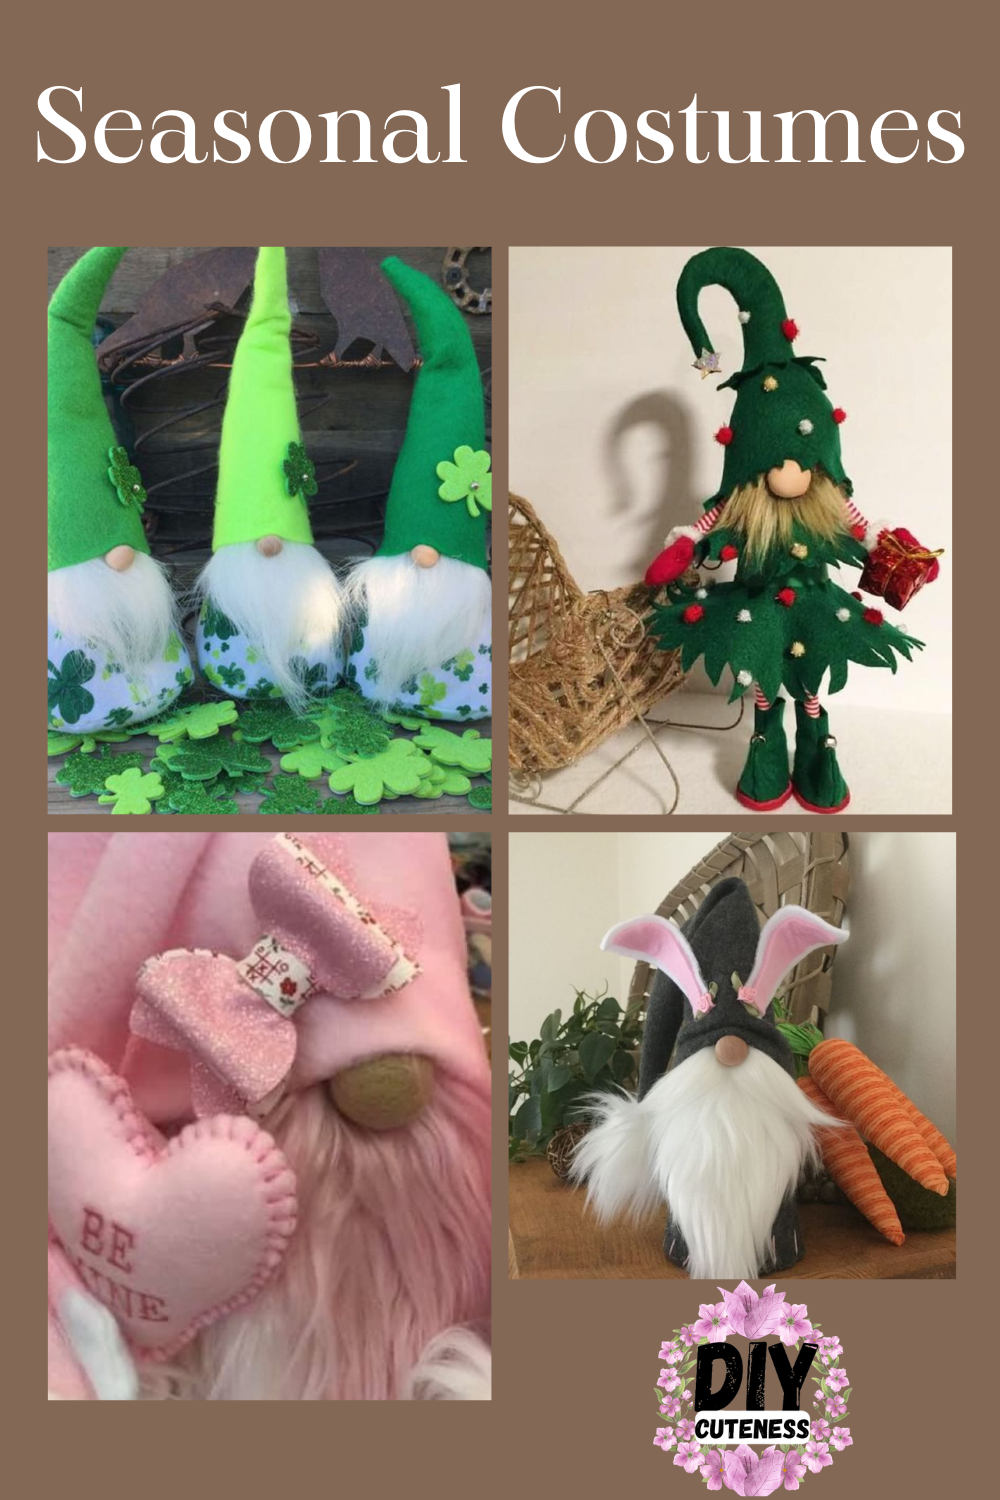
Swap the hat and accessories for each holiday:
- St. Patrick’s Day: Green felt hats with felt or foam shamrocks and a patterned body fabric
- Christmas: A green felt “tree” skirt with pom-pom ornaments and a tiny wrapped gift
- Valentine’s Day: A soft pink hat, a glitter bow, and a stitched felt heart
- Easter: Add felt bunny ears to a gray hat and pair it with fabric carrots
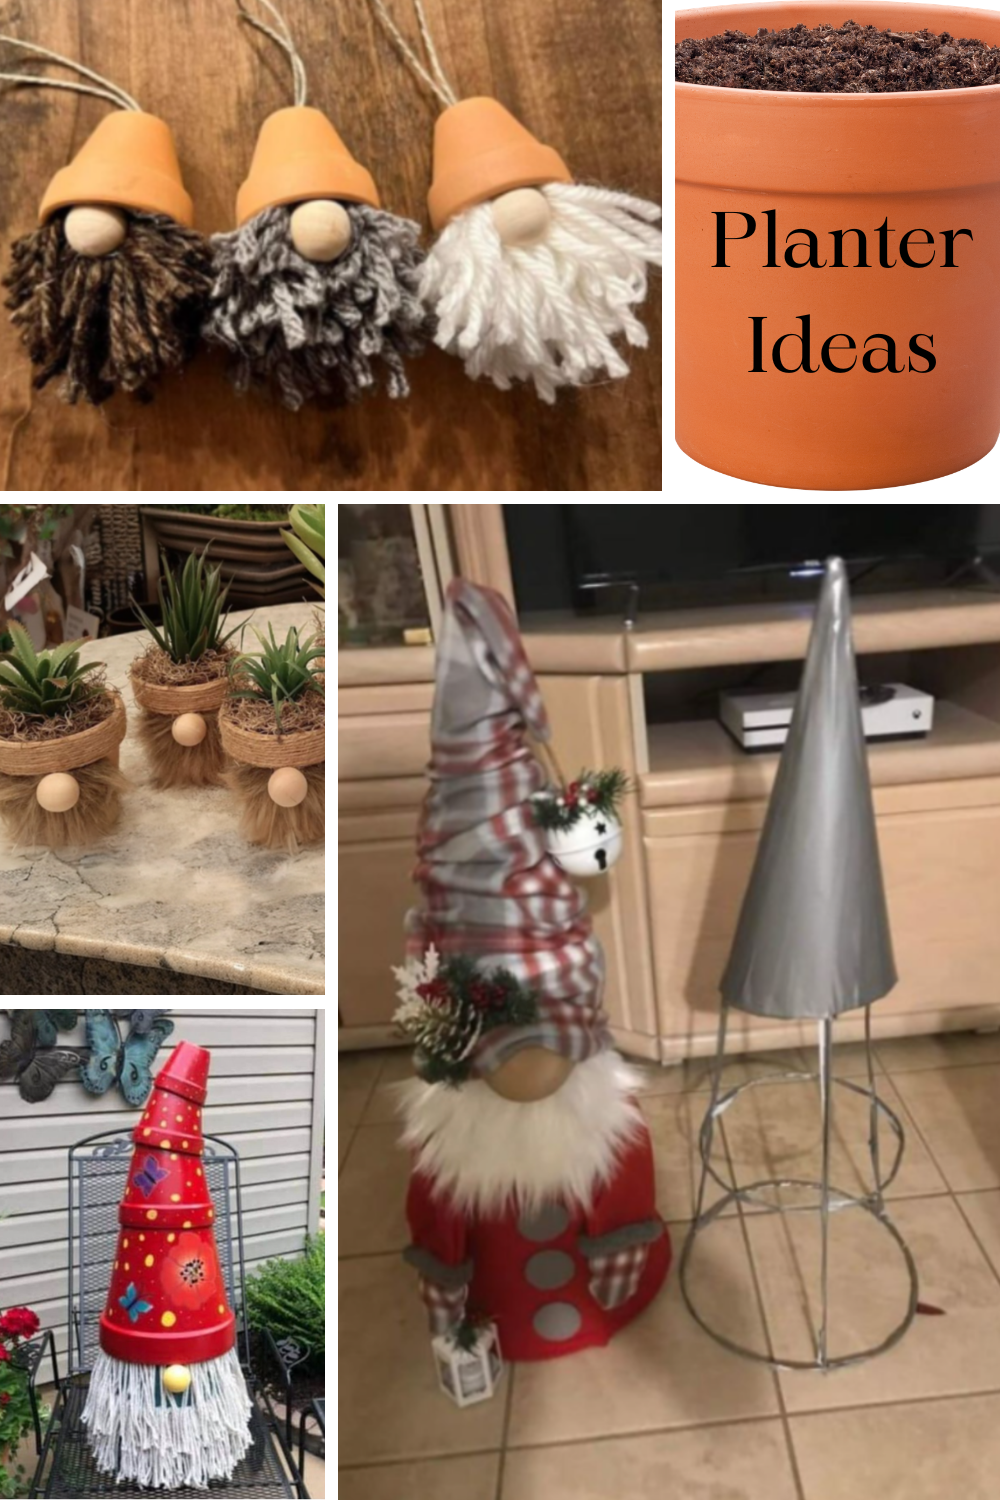
Plant pots are one of the most versatile materials for gnome crafting, and they work for everything from tiny ornaments to tall garden statues. This collage shows five very different ways to use them:
- Mini terracotta pot ornaments (top left): Tiny clay pots become the hats on these hanging gnomes. Add a wooden bead nose and a fluffy yarn beard in brown, gray, or white, then loop a piece of twine through the top so they can hang on a tree or wreath.
- Stacked pot garden gnome (bottom left): Graduated terracotta pots are stacked into a tall, pointed hat, then painted bright red and decorated with polka dots, flowers, and butterflies. A mop-head style yarn beard and a yellow bead nose complete the look. Seal it with outdoor sealer and it’s ready for the porch or garden.
- Succulent planter gnomes (middle left): Small pots wrapped in jute twine double as the hats, and they can hold real or faux succulents. Glue faux fur below the rim for the beard and add a round wooden nose. These make lovely table centerpieces or gifts.
- Christmas tomato stand gnome (right): A tomato tree stand (the cone-shaped wire plant support) is the base for this tall gnome. It’s covered in red felt for the body, with gray felt buttons, then topped with a soft white faux fur beard and a wooden ball nose. The tall plaid hat is draped over the stand’s pointed top. Finish with a jingle bell, pine sprigs, berries, and a little lantern.
Tips for planter and tomato stand gnomes
- Wipe pots clean and let them dry before painting or gluing.
- Use acrylic paint and a coat of sealer for any gnome that will sit outdoors.
- Hot glue works well on terracotta, but use strong outdoor craft glue for pieces that will face the weather.
- For a tomato stand gnome, wrap the wire frame in fabric or batting first so the felt sits smoothly and the shape holds.
- Start with a small ornament-sized pot if you’re new to this method.
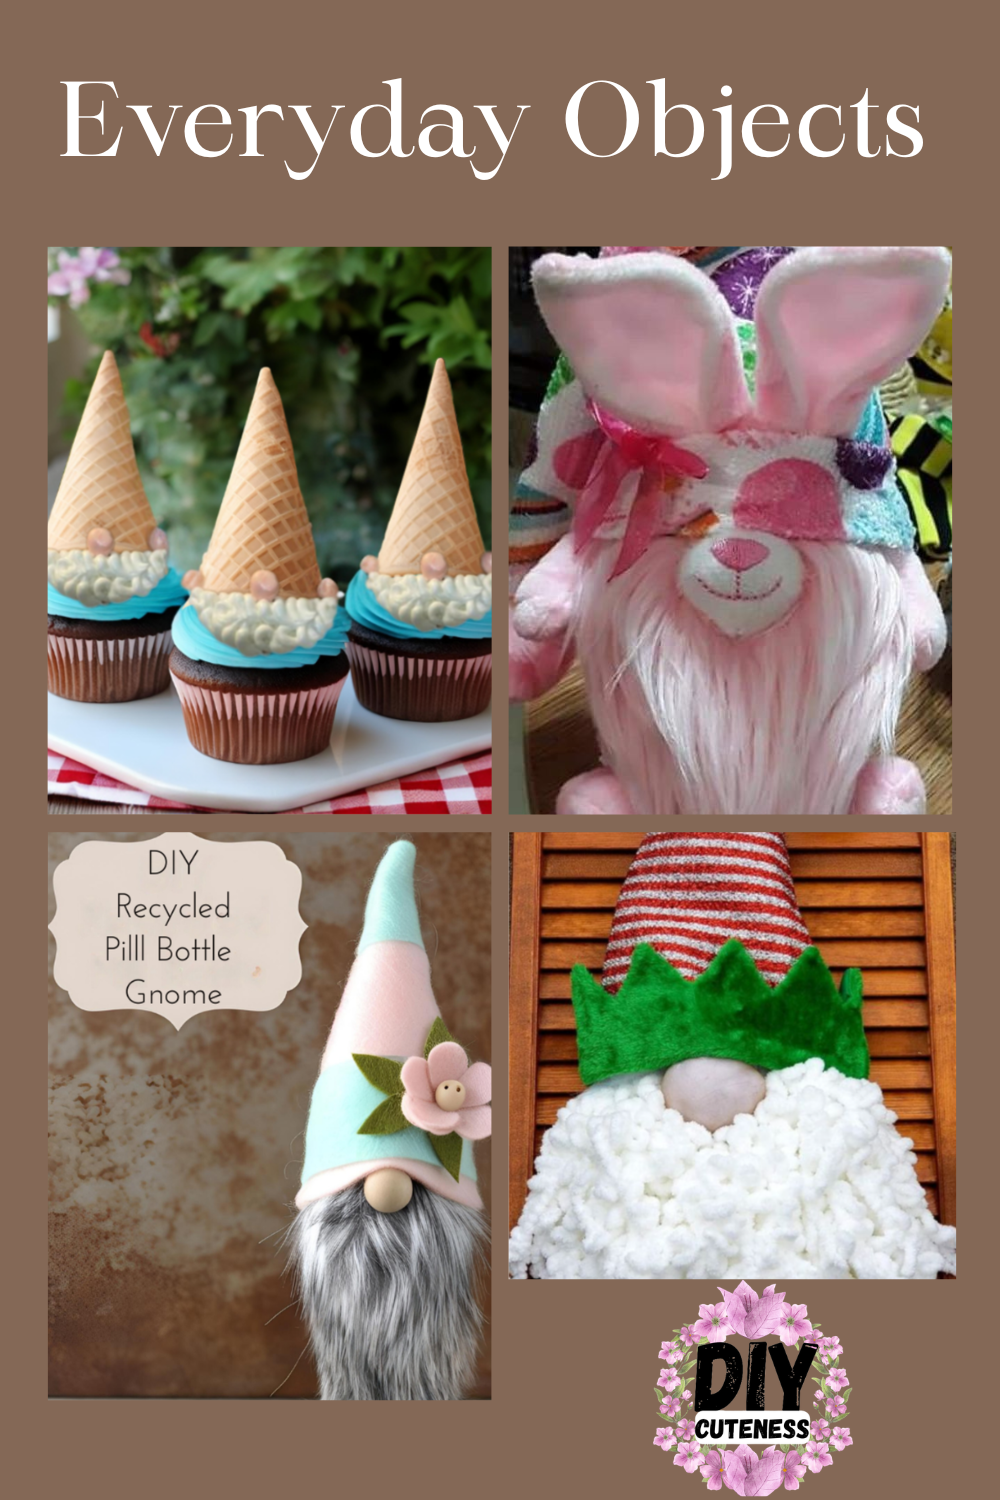
You don’t need special craft supplies to make a gnome. Everyday objects from your kitchen, medicine cabinet, toy box, and even your home’s exterior can become charming gnomes with a little imagination. This collage shows four creative examples:
- Ice cream cone cupcake gnomes (top left): Upside-down sugar cones make perfect pointed hats. Pipe a swirl of white frosting for the beard, add a small candy or mini marshmallow nose, and set each one on a frosted cupcake. They’re a fun treat for a party or gnome-themed celebration.
- Stuffed animal gnome (top right): A plush bunny toy becomes an Easter gnome. Cover the head with a fabric hat or headband, and add a bow and a fluffy pink faux fur beard over the front. This is a great way to give a well-loved stuffed animal a second life.
- Recycled pill bottle gnome (bottom left): A clean, empty pill bottle makes the gnome’s body. Cover it with fabric, add a soft felt cone hat in pastel mint and pink, and finish with a felt flower, a wooden bead nose, and a gray faux fur beard. It’s a tiny project that uses something you’d normally throw away.
- Shutter gnome (bottom right): An old wooden shutter becomes the canvas for a wall-hanging gnome. Attach a red and white striped hat with a green zigzag felt brim, add a rounded nose, and fill in a big, fluffy white yarn beard. The slatted shutter gives it a rustic backdrop, and it’s perfect for Christmas decor on a door, porch, or wall.
Tips for everyday object gnomes
- Wash and dry any container, such as a bottle or jar, before covering it so glue sticks well.
- Use hot glue for fabric and fur, and a small dab of craft glue for lightweight pieces like beads and felt flowers.
- For edible gnomes, use a thick frosting so the beard holds its shape, and add the cone hats just before serving so they stay crisp.
- For a shutter gnome, secure the pieces with strong glue or small nails, and lightly sand or paint the shutter first for a cleaner finish.
- Look for old stuffed animals at thrift stores if you don’t have one at home.
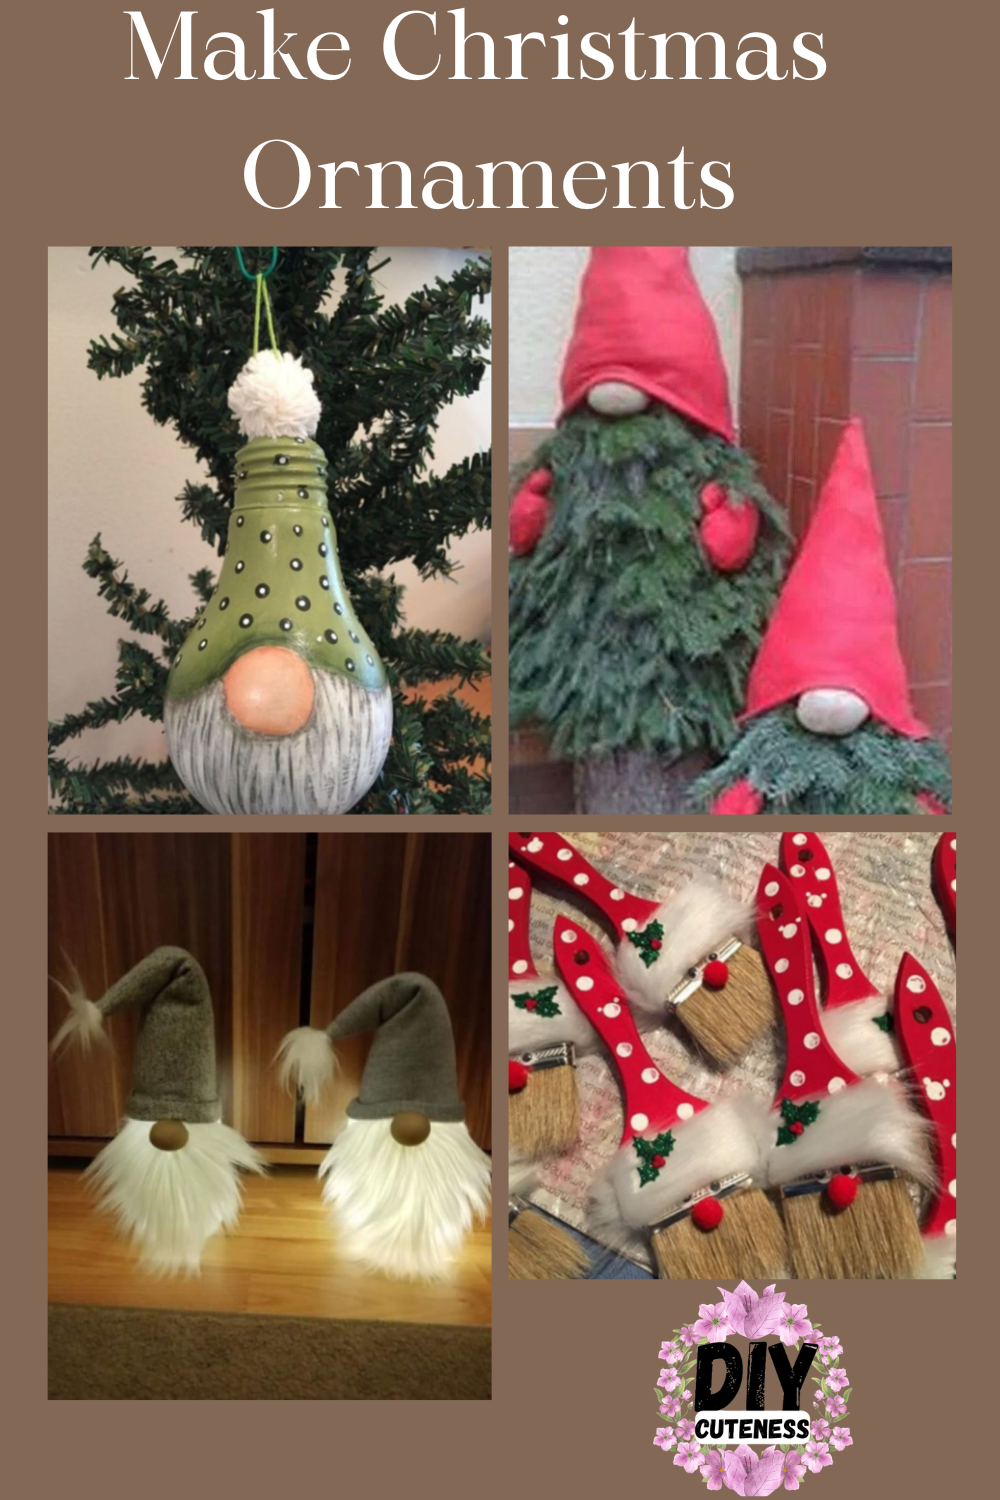
Some of the most charming gnomes start with items you’d never expect. Old light bulbs, evergreen clippings, mason jars, and even used paintbrushes can all become festive gnome decor. This collage shows four creative examples:
- Light bulb gnome ornament (top left): A burned-out light bulb makes a ready-made gnome shape. Paint the top green with white polka dots for the hat, give the lower half a gray, streaky beard, and add a round peach nose. Top it with a fluffy white pom-pom and loop a hanger through the cap to hang it on the Christmas tree. Handle bulbs gently, and use acrylic paint with a clear sealer for a smooth, lasting finish.
- Evergreen branch gnomes (top right): Fresh evergreen boughs form the fluffy, natural beard and body of these gnomes. Add a pointed red felt hat, a smooth stone-colored nose, and little red mittens. They look beautiful by a fireplace or front door, and they bring a fresh pine scent into your home.
- Mason jar gnomes with lights (bottom left): A plain mason jar becomes a glowing gnome. Cover the lid end with a soft gray felt hat topped with a faux fur tassel. Glue a big, fluffy white faux fur beard around the front and add a wooden bead nose. Place a string of battery-powered fairy lights inside the jar, and the beard lights up with a warm glow. These make cozy winter decor for a mantel, shelf, or windowsill.
- Paintbrush Santa gnomes (bottom right): Inexpensive bristle paintbrushes become tiny gnomes. Paint the handle red with white polka dots, glue a strip of white faux fur across the top, and add a holly embellishment and a red pom-pom nose. The bristles act as the beard. They make great gift toppers, ornaments, or small gifts for neighbors and teachers.
Tips for unusual-object gnomes
- Clean and dry glass items such as bulbs and mason jars before painting or gluing so everything sticks.
- Use acrylic paint, then seal it for a lasting finish.
- For mason jar gnomes, use battery-operated lights only, never real candles, and keep the lid or lights easy to reach so you can change the batteries.
- For evergreen gnomes, replace the branches as they dry out, or use faux greenery to keep them looking fresh.
- Use hot glue for faux fur and felt, and a small dab of craft glue for pom-poms and embellishments.
- Paintbrush gnomes are quick and inexpensive, which makes them ideal for making in batches.
Whether you start with a sock, a terracotta pot, a mason jar, or even an old paintbrush, making a gnome is a budget-friendly way to turn things you already have into charming decor. Each method uses the same basics: a pointed hat, a fluffy beard, and a little round nose. Once you’ve mastered those, you can dress your gnome for any season, from shamrocks in March to bunny ears at Easter.
Don’t be afraid to experiment. Mix and match materials, try new colors and fabrics, and make each gnome your own. Gnomes also make thoughtful handmade gifts and fun projects to share with family and friends.
Ready to get festive? Head over to our guide to making tree gnomes for Christmas for step-by-step instructions on this holiday favorite.


